


First download the Linphone Windows Desktop version on the Linphone website. Install it with Cisco's OpenH264 codec: Launch linphone (and accept the firewall rule): Then click on \"use sip account\": Put your SIP username…
Configuring the Windows Linphone SIP Client
Last updated: April 2026
Reading time: ~2 min
Audience: Boxis customers and administrators.
What you'll accomplish
- Complete the configuration or task described in this guide for your Boxis service.
Prerequisites
- Access to the interface, device, or server described below.
- Information or credentials you received from Boxis (contract, welcome e-mail, or client area).
Note Boxis: Offers and screens may differ slightly depending on your product. When in doubt, open a support ticket with your service reference.
First download the Linphone Windows Desktop version on the Linphone website.
Install it with Cisco's OpenH264 codec:

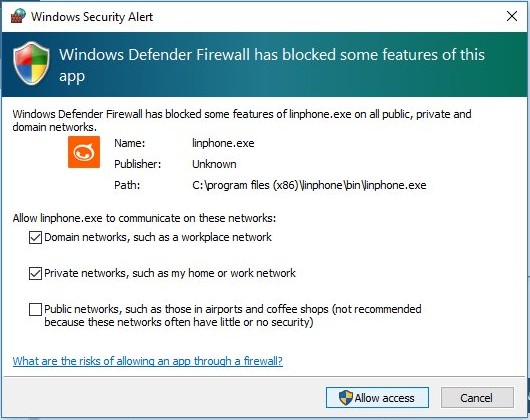
Launch linphone (and accept the firewall rule):
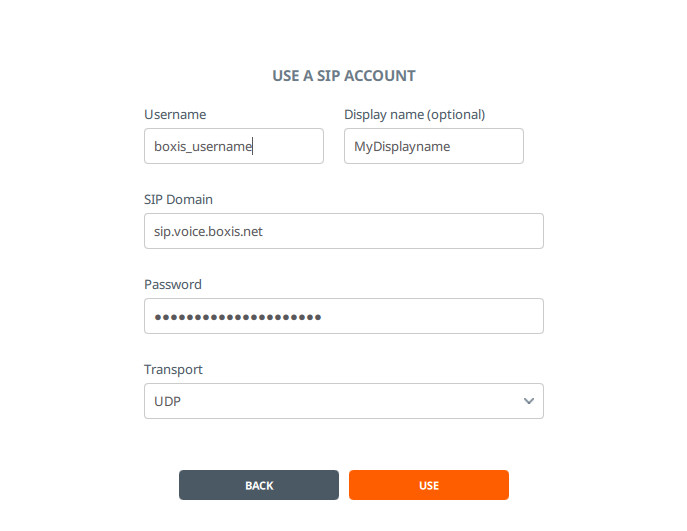
Then click on "use sip account":

Put your SIP username on Username (Display name can be anything), On SIP domain put "sip.voice.boxis.net" (without the quote), and your password, transport must be udp, then click use:
Click on the linphone at the top left:
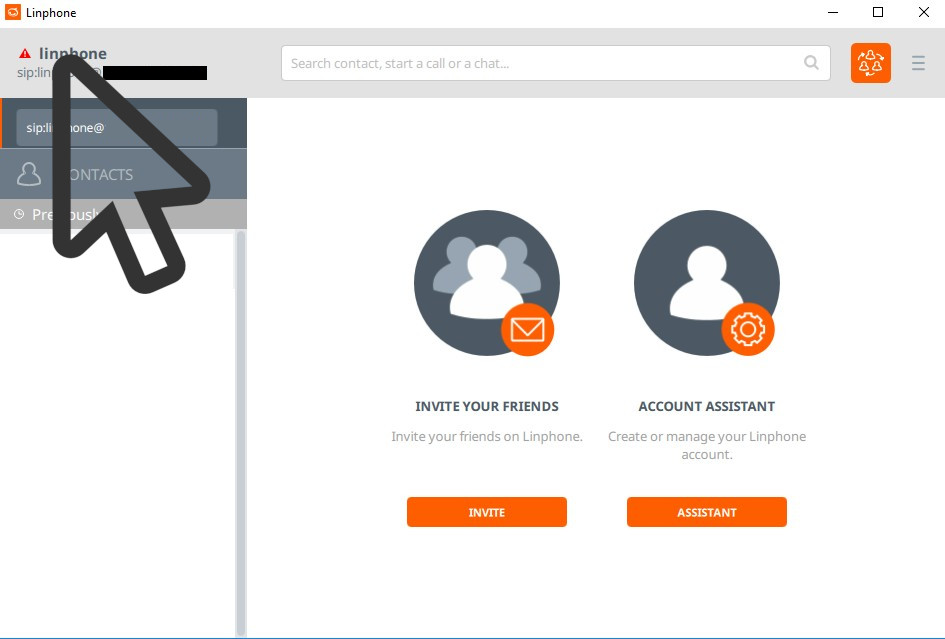
And then Select your account:

Click "OK", your Linphone is ready to accept call.
Expected result
- The product behaves as described in each step (connectivity, message, or UI state).
If something goes wrong
- Repeat the step and check for typos (hostnames, passwords, ports).
- Note the exact error message or screenshot.
- Open a ticket in the Boxis client area with the service name, time of the test, and any trace (e.g. traceroute) if it is a network issue.
See also
- Other articles in the same category in the Boxis knowledge base.
/knowledgebase/— main knowledge base index.