


Find the device's IP address The device configuration is done from the web interface, you only need its IP address.To find your IP address go on your phone and follow the next steps: Menu Setting System Local network IP…
Setting up your Gigaset C530 IP phone
Last updated: April 2026
Reading time: ~3 min
Audience: Boxis customers and administrators.
What you'll accomplish
- Complete the configuration or task described in this guide for your Boxis service.
Prerequisites
- Access to the interface, device, or server described below.
- Information or credentials you received from Boxis (contract, welcome e-mail, or client area).
Note Boxis: Offers and screens may differ slightly depending on your product. When in doubt, open a support ticket with your service reference.
Find the device's IP address
The device configuration is done from the web interface, you only need its IP address. To find your IP address go on your phone and follow the next steps:
- Menu
- Setting
- System
- Local network
- IP address
Then access the configuration interface from your computer. To do that, open your web browser and enter the IP address previously found in your address bar as shown by picture 1.
* Picture 1: Access the configuration interface with your IP address*
You are now in front of the configuration interface of your device.
Configuration of your VoIP Boxis account
Select your language and enter your system PIN code (By default "0000") and click "OK".
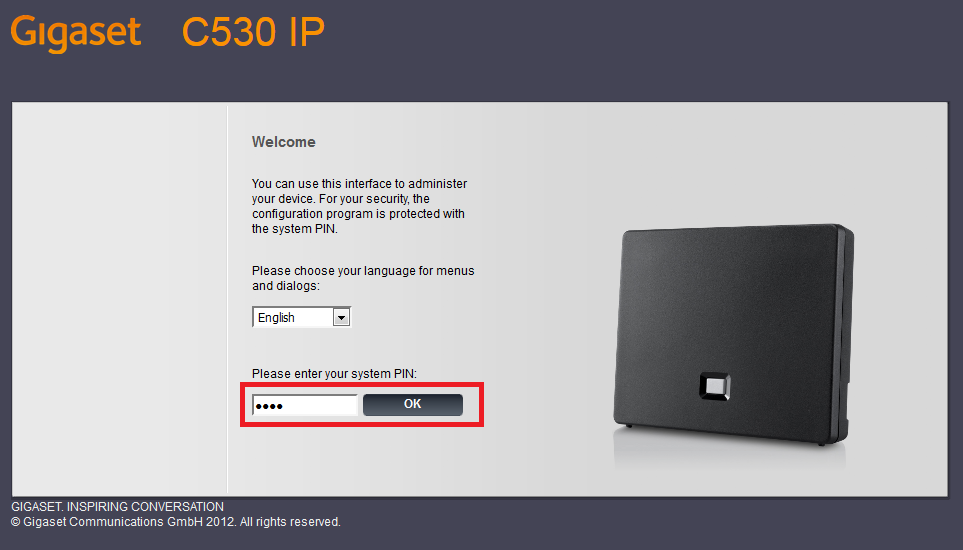
Picture 2: Home screen of the configuration interface
Now click on the tab Settings then Telephony. Select the liquez ensuite sur l'onglet Paramètres puis Téléphonie. Select the field IP1 and click on Edit as shown by picture 3.

Picture 3: Edit a connection
In the new window that appears, enter the configuration information that you received at the establishment of contract (phone number, password server SIP number) as shown by picture 4.
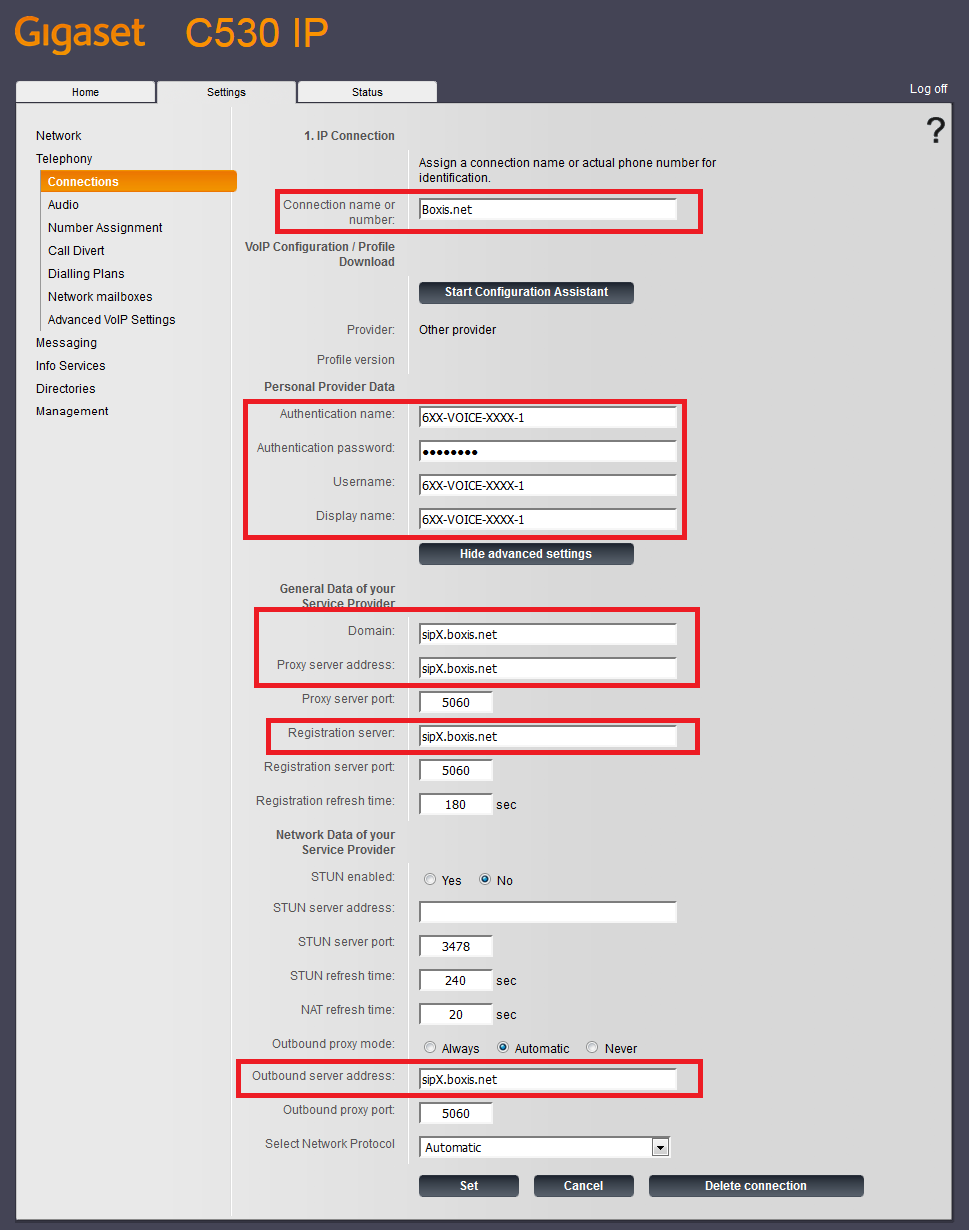
Picture 4: Connection settings
Now, click on Set. You must do that before you leave this page. If you don't, you will lose the modifications you did when leaving the page.
Then click on Audio to configure codecs.
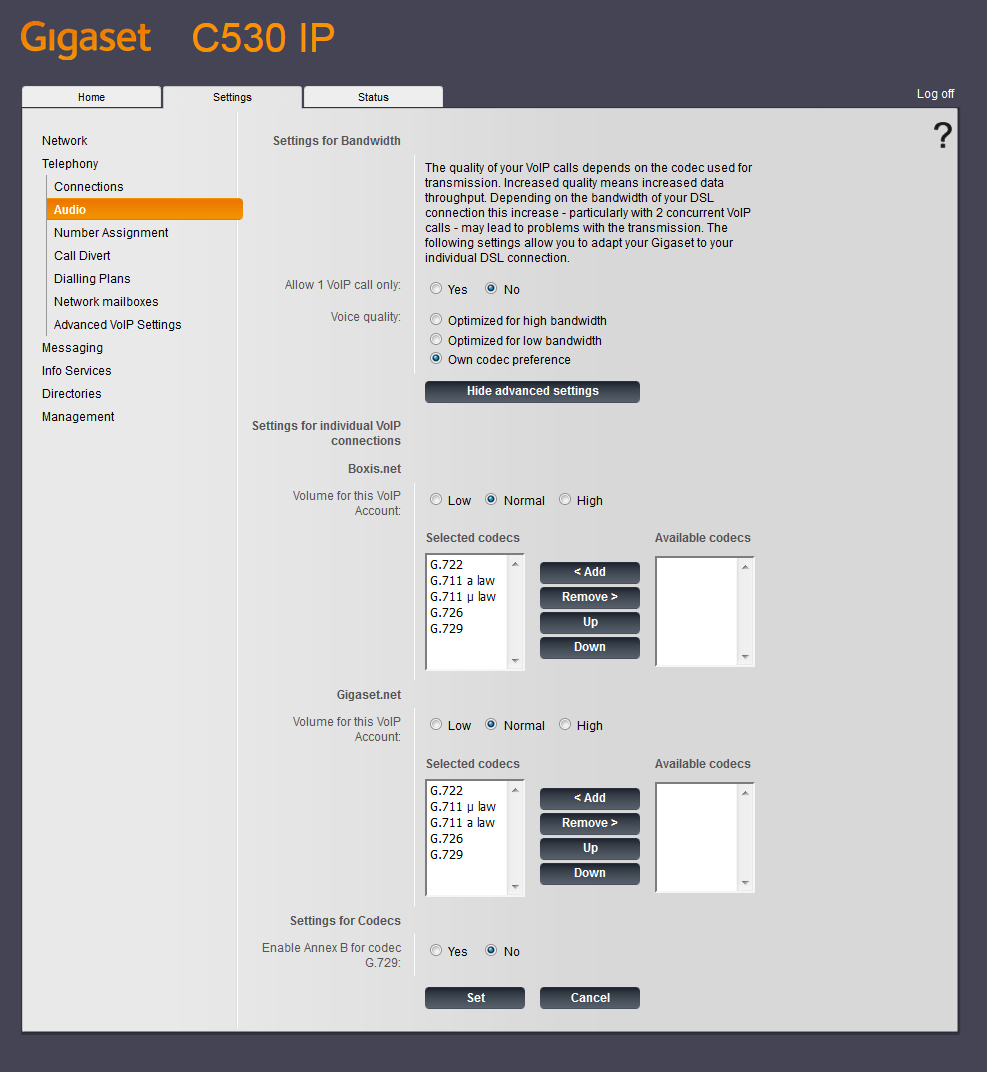
Picture 5: Audio parameters
Don't forget to click on Set before leaving this page so that you don't lose the modification you did.
Click on Advanced VoIP Settings to configure the DTMF parameters. Keep it in automatic mode or select RFC 2833 and SIP Info.
Picture 6: Advanced VoIP Settings
Don't forget to click on Set** before leaving this page so that you don't lose the modification you did.
To finish, go in Number Asssignment to select the network you want to use by default.
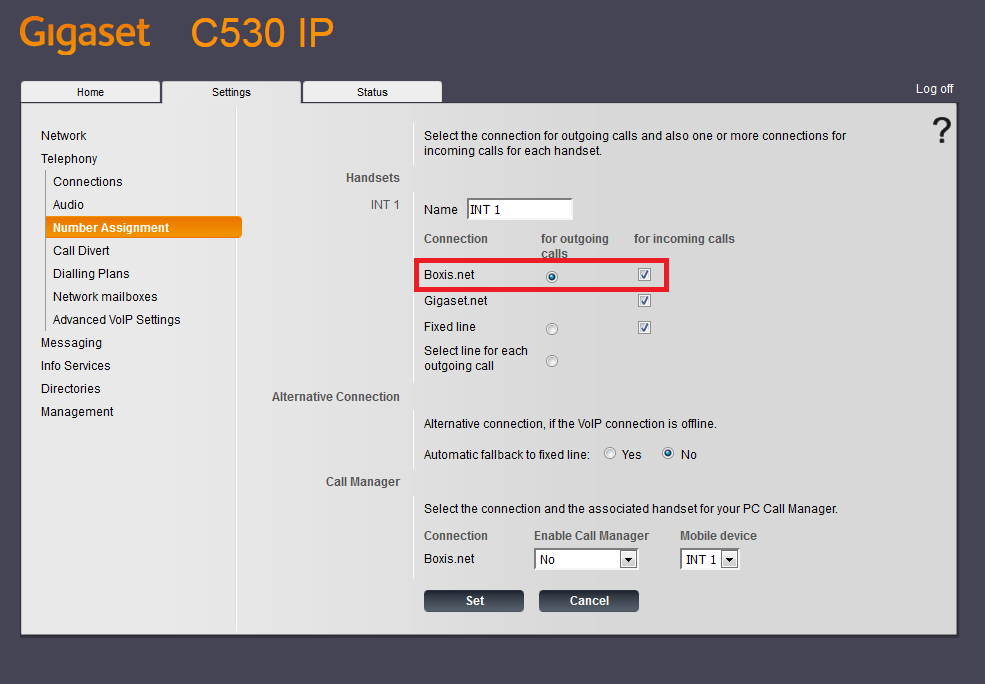
Picture 7: Number assignment
Don't forget to click on Set before leaving this page so that you don't lose the modification you did.
The configuration of your device is done!
Expected result
- The product behaves as described in each step (connectivity, message, or UI state).
If something goes wrong
- Repeat the step and check for typos (hostnames, passwords, ports).
- Note the exact error message or screenshot.
- Open a ticket in the Boxis client area with the service name, time of the test, and any trace (e.g. traceroute) if it is a network issue.
See also
- Other articles in the same category in the Boxis knowledge base.
/knowledgebase/— main knowledge base index.